ESP8266 WiFi Serial Transceiver Module
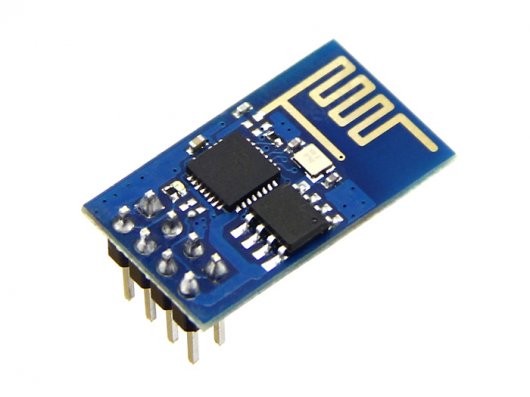 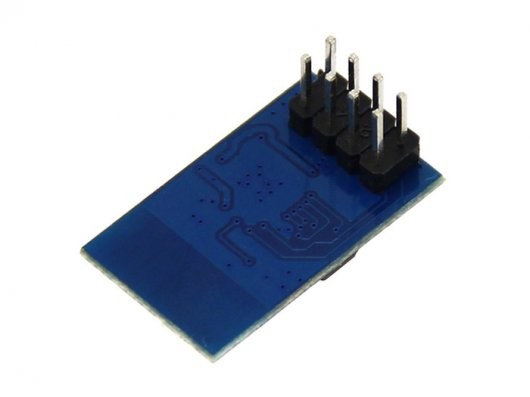 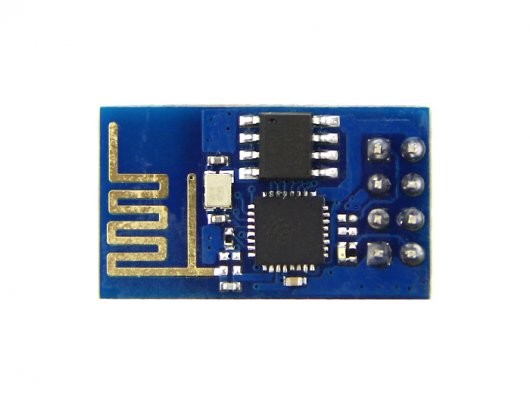
De ESP8266 van Espressif Systems is een chip met WiFi waarmee een complete WiFi toepassing gemaakt kan worden. Of de ESP8266 kan als WiFi netwerkprocessor gebruikt worden voor een andere processor. Deze module met ESP8266 heeft een seriële interface op de header-connector uitgevoerd. Een microcontroller kan via deze interface commando's en data verzenden en ontvangen.
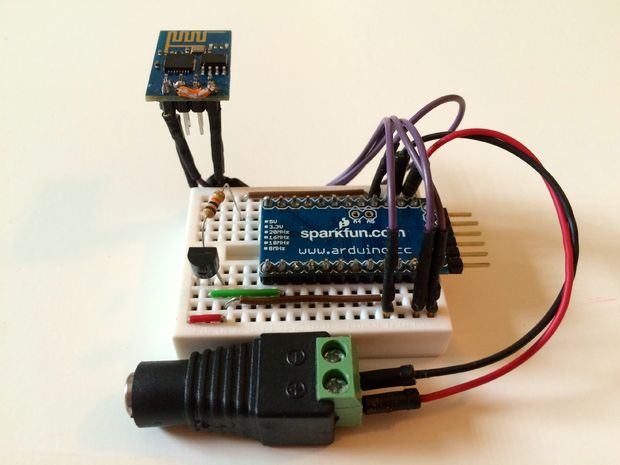
Voorbeeld: ESP8266 Wifi Temperature Logger
This is a very simple demo using the ESP8266 and Arduino to update a remote server (https://thingspeak.com/) using a digital temperature sensor.
ESP8266 Setup

This is where things got tricky. I spent a lot of time testing different configurations. Note that are two version of the ESP8266 going around. The first one has the notification LEDs right next to the board pins. The second one (newer) has the LEDs by the antenna. I have the second one.
The best results came when I loaded V0.922 which allowed me to change the baud rate to 9600. Follow these steps to load this firmware.
http://www.electrodragon.com/w/Wi07c#Firmware_uploading_tool
The best way to test a good connection is by using a USB-to-TTL cable and using a terminal like CoolTerm. Here is the command to change the baud rate:
AT+CIOBAUD=9600
These are the pin connections I used on ESP8266 to USB-to-TTL. I used the regulated 3.3v vcc of the Arduino to power the ESP8266. I know that Arduino vcc 3.3v max is output is 150 mA and ESP8266 will peak at 240 mA. But at the time I had no other regulated 3.3v available. Regular usage for the ESP8266 is at 70mA.
Remember to connect GPIO0 to GND when you are uploading new firmware. After that remove for normal operation.
GND --> GND (power source) | GPIO2 | GPIO0 | URXD --> TX (USB-to-TTL)
UTXD --> RX (USB-to-TTL) | CH_PD <--> VCC | RST | VCC --> VCC (power source)
*Note also had to do USB-to-TTL GND to Arduino GND
Step 3: Arduino Setup and Sketch

ESP8266 to Arduino
GND --> GND Arduino | GPIO2 | GPIO0 | URXD --> TX Arduino
UTXD --> RX Arduino | CH_PD <--> VCC | RST | VCC --> VCC Arduino
Digital Temperature Sensor to Arduino
Arduino GND -- > GND(1) < -- > VDD(3)
DQ(2) -- > 4.7K R --> Arduino 3.3v
Code:
#include
#include
#include
#include
#define ONE_WIRE_BUS 8
OneWire oneWire(ONE_WIRE_BUS);
DallasTemperature sensors(&oneWire);
#define SSID "[YOUR_SSID]"
#define PASS "[YOUR_PASSWORD]"
#define IP "184.106.153.149" // thingspeak.com
String GET = "GET /update?key=[THINGSPEAK_KEY]&field1=";
SoftwareSerial monitor(10, 11); // RX, TX

void setup()
{
  monitor.begin(9600);
  Serial.begin(9600);
  sensors.begin();
  sendDebug("AT");
  delay(5000);
  if(Serial.find("OK")){
    monitor.println("RECEIVED: OK");
    connectWiFi();
  }
}

void loop(){
  sensors.requestTemperatures();
  float tempC = sensors.getTempCByIndex(0);
  tempC = DallasTemperature::toFahrenheit(tempC);
  char buffer[10];
  String tempF = dtostrf(tempC, 4, 1, buffer);
  updateTemp(tempF);
  delay(60000);
}

void updateTemp(String tenmpF){
  String cmd = "AT+CIPSTART=\"TCP\",\"";
  cmd += IP;
  cmd += "\",80";
  sendDebug(cmd);
  delay(2000);
  if(Serial.find("Error")){
    monitor.print("RECEIVED: Error");
    return;
  }
  cmd = GET;
  cmd += tenmpF;
  cmd += "\r\n";
  Serial.print("AT+CIPSEND=");
  Serial.println(cmd.length());
  if(Serial.find(">")){
    monitor.print(">");
    monitor.print(cmd);
    Serial.print(cmd);
  }else{
    sendDebug("AT+CIPCLOSE");
  }
  if(Serial.find("OK")){
    monitor.println("RECEIVED: OK");
  }else{
    monitor.println("RECEIVED: Error");
  }
}
void sendDebug(String cmd){
  monitor.print("SEND: ");
  monitor.println(cmd);
  Serial.println(cmd);
}

boolean connectWiFi(){
  Serial.println("AT+CWMODE=1");
  delay(2000);
  String cmd="AT+CWJAP=\"";
  cmd+=SSID;
  cmd+="\",\"";
  cmd+=PASS;
  cmd+="\"";
  sendDebug(cmd);
  delay(5000);
  if(Serial.find("OK")){
    monitor.println("RECEIVED: OK");
    return true;
  }else{
    monitor.println("RECEIVED: Error");
    return false;
  }
}
*UPDATE. Once your done testing/monitoring. Load the same sketch without SoftwareSerial Monitor. This gave me better results as stand alone.
#include
#include
#include
#define ONE_WIRE_BUS 8
OneWire oneWire(ONE_WIRE_BUS);
DallasTemperature sensors(&oneWire);

#define SSID "[YOUR_SSID]"
#define PASS "[YOUR_PASSWORD]"
#define IP "184.106.153.149" // thingspeak.com
String GET = "GET /update?key=[THINGSPEAK_KEY]&field1=";


void setup()
{
  Serial.begin(9600);
  sensors.begin();
  Serial.println("AT");
  delay(5000);
  if(Serial.find("OK")){
    connectWiFi();
  }
}

void loop(){
  sensors.requestTemperatures();
  float tempC = sensors.getTempCByIndex(0);
  tempC = DallasTemperature::toFahrenheit(tempC);
  char buffer[10];
  String tempF = dtostrf(tempC, 4, 1, buffer);
  updateTemp(tempF);
  delay(60000);
}

void updateTemp(String tenmpF){
  String cmd = "AT+CIPSTART=\"TCP\",\"";
  cmd += IP;
  cmd += "\",80";
  Serial.println(cmd);
  delay(2000);
  if(Serial.find("Error")){
    return;
  }
  cmd = GET;
  cmd += tenmpF;
  cmd += "\r\n";
  Serial.print("AT+CIPSEND=");
  Serial.println(cmd.length());
  if(Serial.find(">")){
    Serial.print(cmd);
  }else{
    Serial.println("AT+CIPCLOSE");
  }
}


boolean connectWiFi(){
  Serial.println("AT+CWMODE=1");
  delay(2000);
  String cmd="AT+CWJAP=\"";
  cmd+=SSID;
  cmd+="\",\"";
  cmd+=PASS;
  cmd+="\"";
  Serial.println(cmd);
  delay(5000);
  if(Serial.find("OK")){
    return true;
  }else{
    return false;
  }
}
ThinkSpeak is just awesome! Follow these simple steps to start you own feed:
Sign up for a FREE account at https://thingspeak.com/
Go to Channels --> Create New Channel (you can leave all defaults)
Go to API Keys and get your KEY
Test by putting this on your browser
http://api.thingspeak.com/update?key=[THINGSPEAK_KEY]&field1=0
Check your results
http://api.thingspeak.com/channels/[CHANNEL_ID]/feed.json?key=[THINGSPEAK_KEY]
Now you are ready to start sending data.
Documenten:
esp_iot_sdk_v0.6.zip
ESP8266-Library-master.zip
ESP8266 WIFIATCOMMANDS_English.pdf
ESP8266_Specifications_English.pdf
Ref:
http://www.instructables.com/id/ESP8266-Wifi-Temperature-Logger/
https://hackaday.io/project/2879-esp8266-wifi-module-library
|